Hello dear Amigurumi Knitting Lovers,Today we share a free amigurumi crochet pattern for you.
As you know, we share new amigurumi free patterns every day. master crochets, amigurumi gazelles, amigurumi bears, amigurumi pola, amigurumi pandas, amigurumi penguins, amigurumi giraffes, amigurumi lama, amigurumi pigs, amigurumi rabbit, amigurumi clowns, amigurumi dolls, amigurumi unicorn, amigurumi elephants, amigurumi unicorn , amigurumi hippos, amigurumi monkeys, amigurumi cats, amigurumi dogs and more…
Don’t forget to subscribe to receive notifications of our new free recipes.
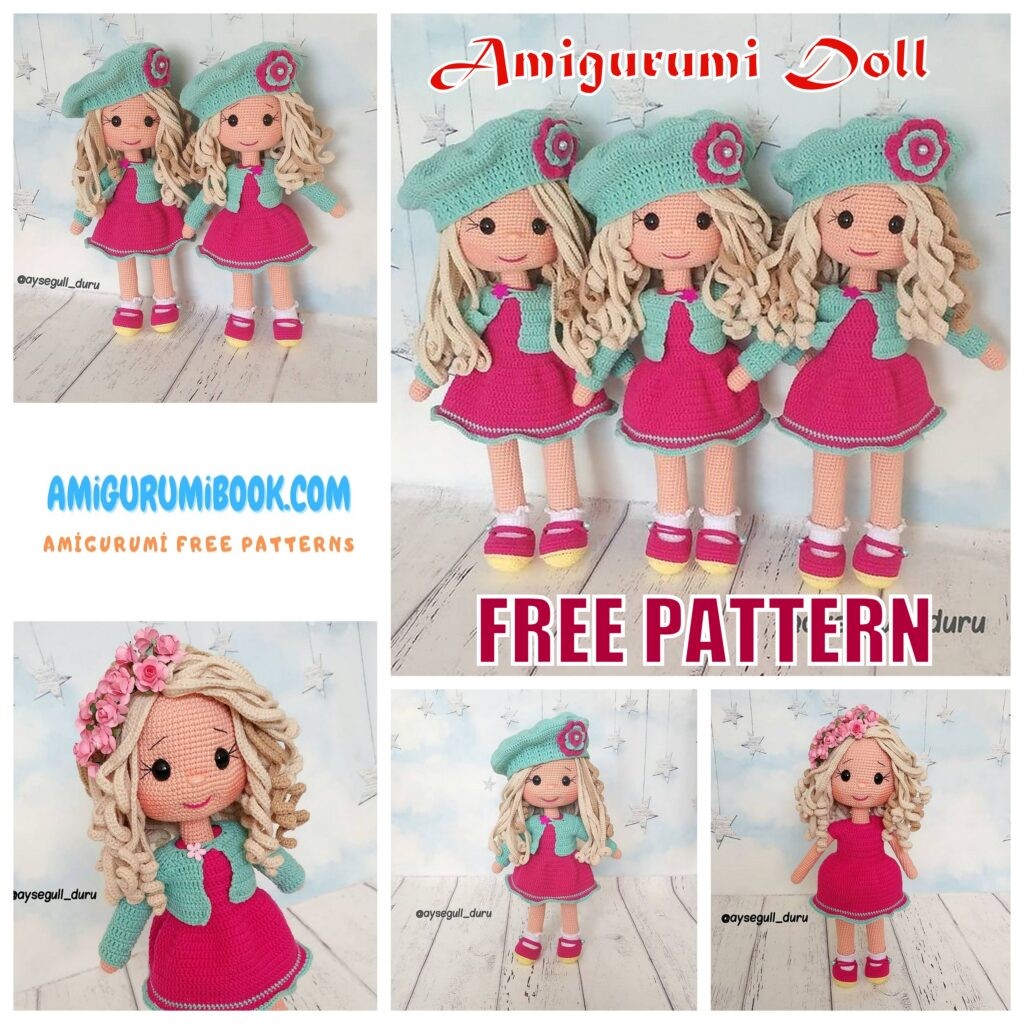
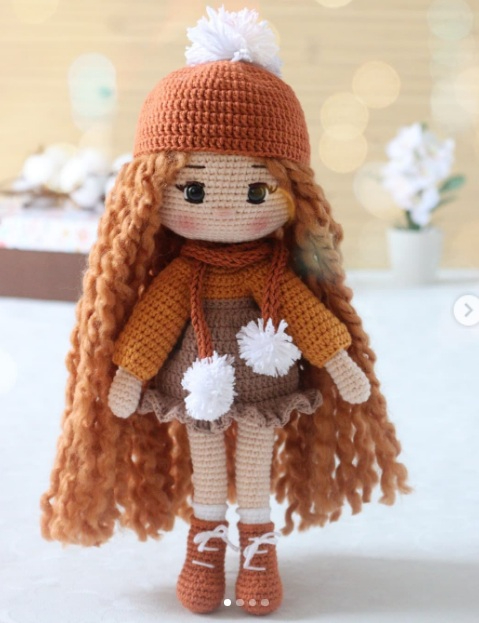
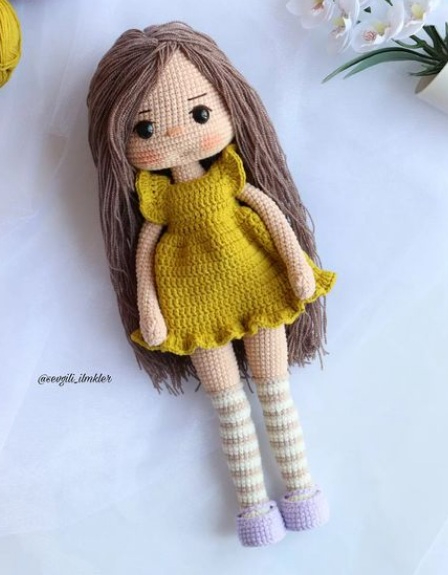
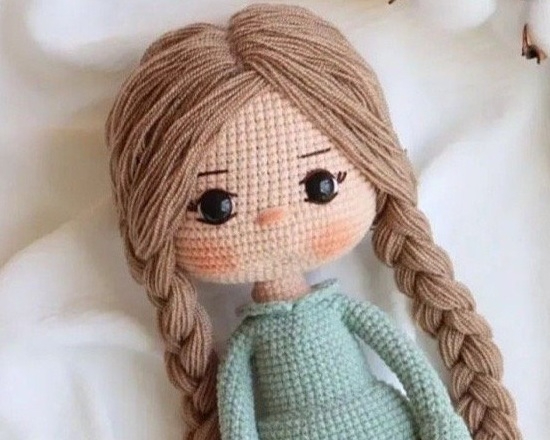
Today, the new daily crochet pattern Amigurumi Sara And Saulo Dolls Free Crochet Pattern, I want to give you some information about this pattern;


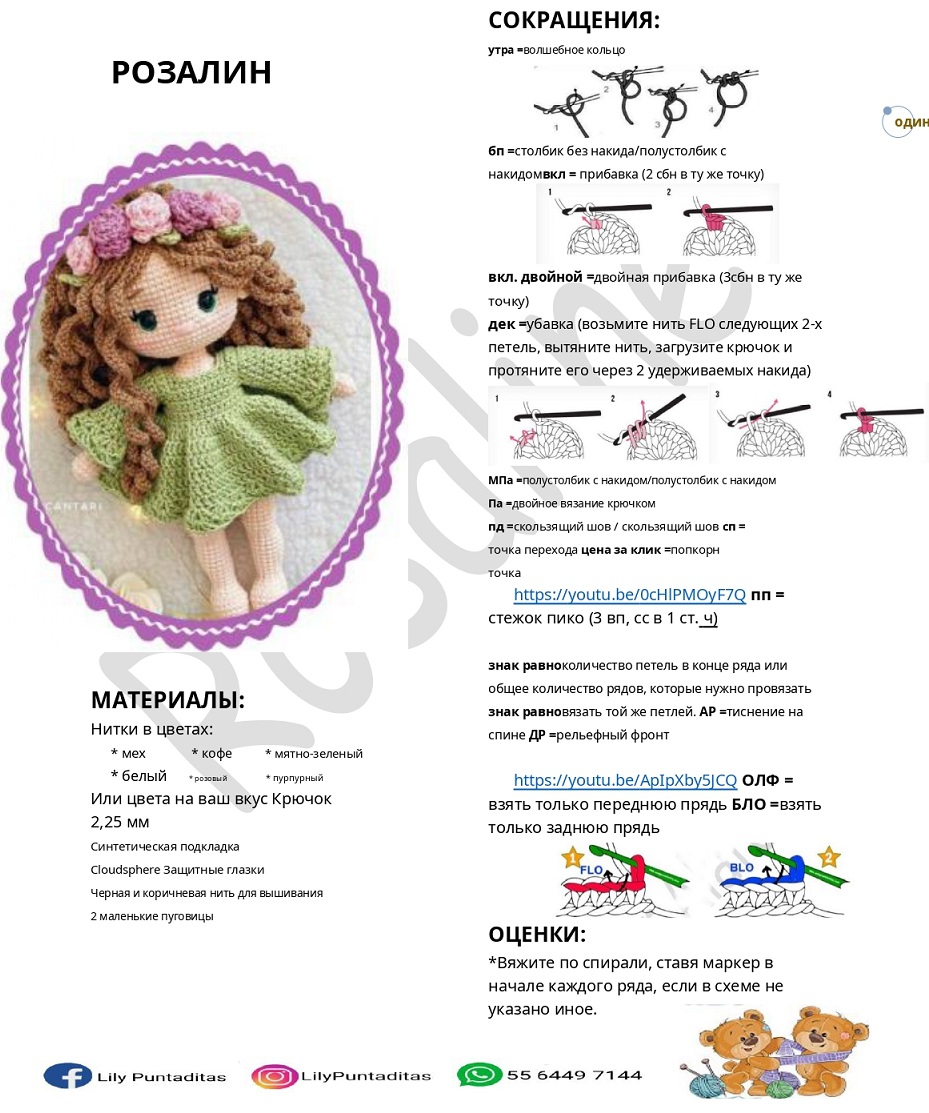
SARA DOLL
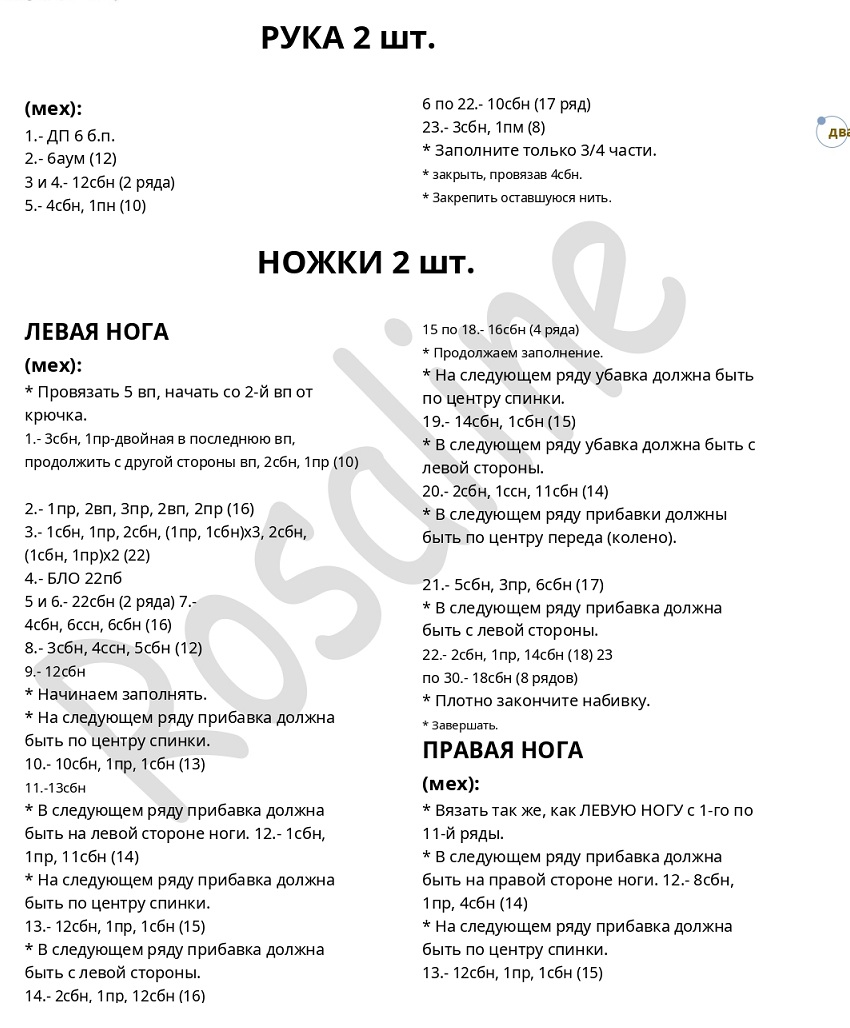
BRACES 2X
Use a 2.0mm needle
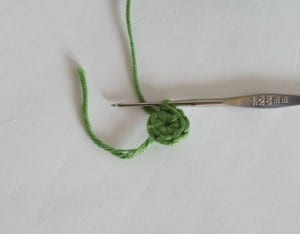
1 magic ring (06)
2 (inc)6x (12)
3 sc, around (12 )
4 (1sc, 1inc)6x (18)
5 sc, around (18)
6 (4sc, 1dec)3x (15)
7 (3sc, 1dec)3x (12)
8 to 14 sc, around (12) (7row)
CHANGE TO WHITE COLOR
15 sc, around (in Blo) (12)
16 to 26 sc , around (12) (11 row)
FINISH THE ARMS AND RESERVE

PERNA’S 2X
1 magic ring (08)
2 (inc)8x (16)
3 (1sc, 1inc)8x (24)
4 (2sc, 1ahm)8x (32)
5 to 7 sc, around (32) (3row)
8 10sc, (1sc, 1dec)4x 10sc (28)
9 10sc, 4dec, 10sc (24)
10 10sc, 2dec, 10sc (22)
11 1dec, 6sc, 5hdc, 7sc, 1dec (20)
12 to 13 sc, around (20 ) (2 row)
CHANGE TO CHANTILLY COLOR
14 sc, around (in Blo) (20)
15 (8 sc, 1 dec) 2x (18)
16 to 30 sc, around (18) (15 row)
FINISH THE THREADS AND RESERVE
SOCK DETAIL
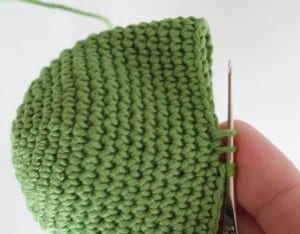
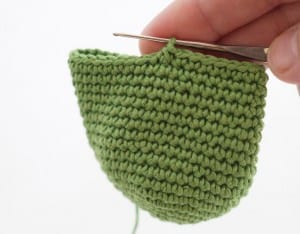
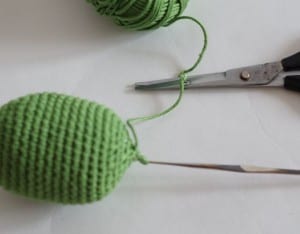
1 Insert the needle as shown in photo 1.
Work single crochet all the way around.
Tie off the wires.
JOINT LEGS
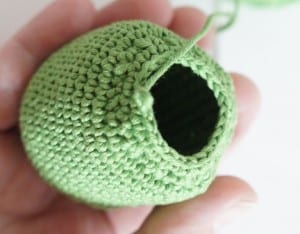
Fold the first leg and center the foot so it doesn’t get
crooked, insert the needle as shown in photo 1. Close the leg
with 9 sc, do 4 ch, fold the second leg very carefully
so the foot is centered, insert the needle and
close with 9pb.
LEGS CONTINUATION
From here we will continue counting the rows, so let’s
consider it to be row 31.
31, turn the work and take only the front straps, do 9 sc,
4 sc in the chains, 9 sc.
Turn the piece over and continue making 9sc in the remaining straps, 4sc on the
other side of the chains, 9sc, do another 11sc, and mark the last
stitch, this will be our starting point. (44)
32 to 37 sc, around (44) (6 row)
38 (9 sc, 1 dec) 4x (40)
39 sc, around (in Blo) (40)
40 to 46 sc, around (40) (7 row )
47 (8sc, 1dec)4x (36)
48 to 49 sc, around (36) (2row)
CUNÇAO ARMS
50 9sc, (6sc joining the first arm) 10sc in front,
(6sc joining the second arm) 5sc (36)
51 (4sc, 1dec)6x (30)
52 (8sc, 1dec)3x (27)
CHANGE TO THE COLOR CHANTILLY
53 sc, around (in Blo) (27)
54 sc, around (27)
LEAVE A LONG THREAD FOR SEWING
HEAD
1 magic ring (06)
2 (inc)6x (12)
3 (1sc, 1inc)6x (18)
4 (2sc, 1inc)6x (24)
5 (3sc, 1inc)6x (30)
6 (4sc, 1inc) 6x (36)
7 (5sc, 1inc)6x (42)
8 (6sc, 1inc)6x (48)
9 (7sc, 1inc)6x (54)
10 to 16 sc, around (54) (7row)
17 20sc, 3inc, 8sc, 3inc, 20sc (60)
18 to 22 sc, around (60) (5row)
PLACE THE EYES BETWEEN THE
INCREASES IN ROUNDS 16 and 17 WITH
9 STITCHES AWAY.
EMBROIDE THE EYEBROWS 3 ROWS
ABOVE THE EYES, USE THINNER THREAD.
EMBROIDE THE NOSE 1 ROW BELOW
THE EYES, BETWEEN 4 STITCHES.
23 (8sc, 1dec)6x (54)
24 (7sc, 1dec)6x (48)
25 (6sc, 1dec)6x (42)
26 (5sc, 1dec)6x (36)
27 (4sc, 1dec)6x (30)
28 (3sc, 1dec)6x (24)
29 (2sc, 1djm)6x (18)
30 (1sc, 1dec)6x (06)
31 (Dec)6x (06)
CLOSE WITH THE INVERTED MAGIC RING AND
FINISH THE THREAD.
HAIR
1 magic ring (06)
2 (inc)6x (12)
3 (1sc, 1inc)6x (18)
4 (2sc, 1inc)6x (24)
5 (3sc, 1inc)6x (30)
6 (4sc, 1inc) 6x (36)
7 (5sc, 1inc)6x (42)
8 (6sc, 1inc)6x (48)
9 (7sc, 1inc)6x (54)
10 to 11 sc, around (54) (2row)
12 sc, around (in Blo) (54)
Use a 2.5mm stitch needle
and make 24mdc, fasten in the
next stitch with 1sl st and in the
next stitch make another 1scx
to go up another 25ch: and continue
doing the same process until
all the loops are completed.
Leave a long thread for sewing
DINO CAP
1 anel mágico (06)
2 (aum)6x (12)
3 (1pb, 1aum)6x (18)
4 (2pb, 1aum)6x (24)
5 (3pb, 1aum)6x (30)
6 (4pb, 1aum) 6x (36)
7 (5pb, 1aum)6x (42)
8 (6pb, 1aum)6x (48)
9 (7pb, 1aum)6x (54)
10 (8pb, 1aum)6x (60)
11 a 15 pb, em volta (60) (5carr)
16 (9pb, 1 aum)6x (66)
17 a 18 pb, em volta (66) (2carr)
19 pb, em volta (em Flo) (66)
20 pb, em volta (66 )
ARREMATE O FIO


MACACAO
1 Make 26ch: Fasten with 1sl st, forming a circle, continue
with sc in a spiral. We will have 25 double crochets considering
that we fasten the last one with 1 sl st.
2 to 8 sc, around (25) (7 row)
Do the same process on the second part of the jumpsuit but do not
fasten the thread, we will join the two parts. There must be
25 stitches on each part of the jumpsuit.
Make 3ch: Fasten with 1sc, make 24sc, 3sc in the chains, 25sc in the
other part, 3sc on the other side of the chains, 25sc. (56)
10 to 15 sc, around (56) (6 row)
16 (6 sc, 1 dec) 7x (49) 17
to 18 sc, around (49) (2 row)
19 (5 sc, 1 dec) 7x (42)
20 to 24 sc, around (42) (5 row)
FINISH THE THREAD.
FRONT PATTER OVERALLS
1 14sc
2 turn, 14sc
3 turn, 14sc
4 turn, 14sc
5 turn, 14sc
6 turn, 14sc
7 turn, 1sbx
FINISH THE YARN.
JOSHENSARIES
1 insert the needle as shown in the photo
- Climb 28 chain: Turn and skip 8 stitches, and make
20 sc, fasten in the next stitch with 1 sc.
2 Go up 28 chain: Turn and skip 8 stitches, and make
20 sc, fasten in the next stitch with 1 sc.
FINISH THE THREAD.
HOT
1 anel mágico (06)
2 (2pb, 1aum)2x (08)
3 (3pb, 1aum)2x (10)
4 a 5 pb, em volta (10) (2carr)
6 (4pb, 1aum)2x (12)
7 (5pb, 1aum) 2x (14)
8 (6pb,1aum)2x (16)
9 (7pb, 1aum)2x (18)
10 (8pb, 1aum)2x (20)
11 a 12 pb, em volta (20) (2carr)
13 (9pb, 1aum)2x (22)
14 (10pb, 1aum)2x (24)
15 a 20 pb, em volta (24) (6carr)
21 (2pb, 1dim)6x (18)
22 pb, em volta (18)
23 (1pb, 1dim)6x (12)
24 a 25 pb, em volta (12) (2carr)
THORNS 3X
1 magic ring (06)
2 (1sc, 1inc)3x (09)
3 sc, around (09)
4 (2sc, 1inc)3x (12)
FOLD THE PIECE AND CLOSE WITH 5Sc ,
LEAVE A LONG THREAD FOR
SEWING.
SAPATO 2X
1 magic ring (08)
2 (inc)8x (16)
3 (1sc, 1inc)8x (24)
4 (2sc, 1inc)8x (32)
5 sc, (in Blo) (32)
6 to 8 sc, in turn (32) (3 row)
9 10sc, (1sc, 1dec)4x 10sc (28)
10 12sc, 2dec, 12sc (26)
11 8sc, (skip 10 stitches, make 8
chains), 8sc
FINISH THE YARN.
2X THORNS
1 magic ring (06)
2 (1 sc, 1 inc) 3x (09)
3 sc, around (09)
FOLD THE PIECE AND CLOSE WITH 4 sc
LEAVE A LONG THREAD FOR
SEWING
DONE!
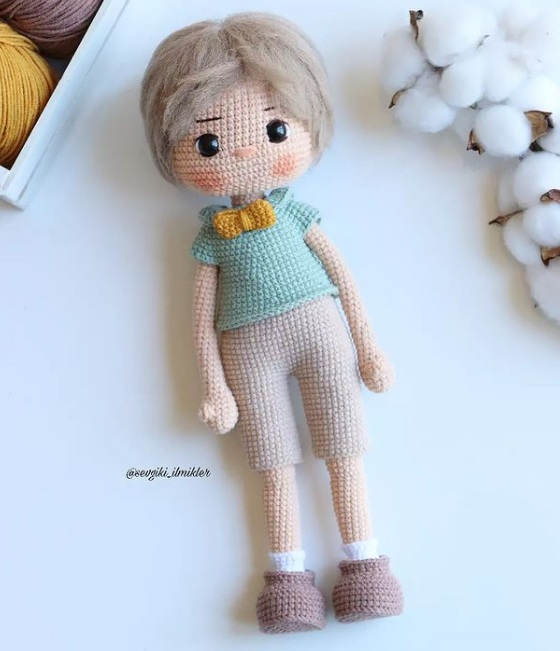
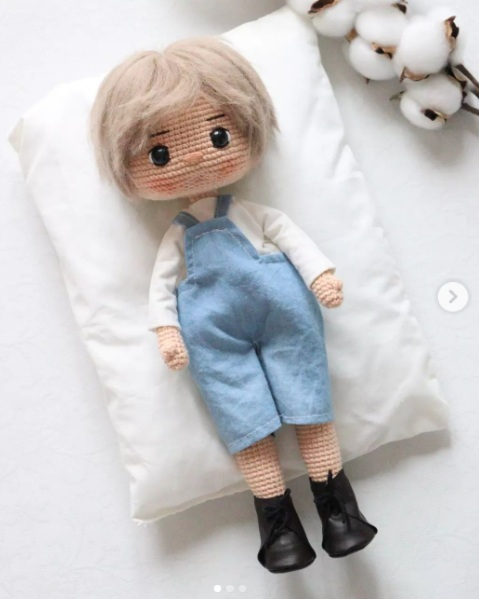
SAULO DOLL
BRACES 2X
1 magic ring (06)
2 (inc)6x (12)
3 sc, around (12)
4 (1sc, 1inc)6x (18)
5 sc, around (12)
6 (4sc, 1dec)3x (15)
7 (3sc, 1dec)3x (12)
8 to 18 sc, around (12) (11row)
CHANGE TO QUARRY COLOR
19 sc, around (in Blo) (12)
20 sc, around (12)
CHANGE TO WHITE COLOR
21 to 22 sc, around (12)
CHANGE TO QUARRY COLOR
23 to 24 sc, around (12)
CHANGE TO WHITE COLOR
25 to 26 sc, around (12)
FINISH THE ARMS AND RESERVE
PERNA’S 2X
1 magic ring (08)
2 (inc)8x (16)
3 (1sc, 1inc)8x (24)
4 (2sc, 1ahm)8x (32)
5 to 7 sc, around (32) (3row)
8 10sc, (1sc, 1dec)4x 10sc (28)
9 10sc, 4dec, 10sc (24)
10 10sc, 2dec, 10sc (22)
11 1dec, 6sc, 5hdc, 7sc, 1dec (20)
12 to 13 sc, around (20 ) (2 row)
CHANGE TO CHANTILLY COLOR
14 sc, around (in Blo) (20)
15 (8 sc, 1 dec) 2x (18)
16 to 30 sc, around (18) (15 row)
FINISH THE THREADS AND RESERVE
JOINT LEGS
Fold the first leg and center the foot so it doesn’t get
crooked, insert the needle and close the leg with 9 sc, do 4 ch,
fold the second leg very carefully so the foot
is centered, insert the needle and close with 9 sc.
LEGS CONTINUATION
From here we will continue counting the rows, so let’s
consider it to be row 31.
31, turn the work and take only the front straps, do 9 sc,
4 sc in the chains, 9 sc.
Turn the piece over and continue making 9sc in the remaining straps, 4sc on the
other side of the chains, 9sc, do another 11sc, and mark the last
stitch, this will be our starting point. (44)
32 to 37 sc, around (44) (6 row)
38 (9 sc, 1 dec) 4x (40)
CHANGE TO QUARRY COLOR
39 sc, around (in Blo) (40)
40 sc, around (40 )
CHANGE TO WHITE COLOR
41 to 42 sc, around (40) (2 row)
CHANGE TO QUARRY COLOR
43 to 44 sc, around (40) (2 row)
CHANGE TO WHITE COLOR
45 to 46 sc, around ( 40) (2 row)
CHANGE TO QUARRY COLOR
47 (8sc, 1dec)4x (36)
48 sc, around (36)
CHANGE TO WHITE COLOR
49 sc, around (36)
JOINT ARMS
50 9sc, (6sc joining the first arm) 10sc in front,
(6sc joining the second arm) 5sc (36)
CHANGE TO QUARRY COLOR
51 (4sc, 1dec)6x (30)
52 (8sc, 1dec)3x (27)
CHANGE TO CHANTILLY COLOR
53 sc, around (in Blo) (27)
54 sc, around (27)
LEAVE A LONG THREAD FOR SEWING
HEAD
1 magic ring (06)
2 (inc)6x (12)
3 (1sc, 1inc)6x (18)
4 (2sc, 1inc)6x (24)
5 (3sc, 1inc)6x (30)
6 (4sc, 1inc) 6x (36)
7 (5sc, 1inc)6x (42)
8 (6sc, 1inc)6x (48)
9 (7sc, 1inc)6x (54)
10 to 16 sc, around (54) (7row)
17 20sc, 3inc, 8sc, 3inc, 20sc (60)
18 to 22 sc, around (60) (5row)
PLACE THE EYES BETWEEN THE
INCREASES IN ROUNDS 15 AND 16 WITH
9 STITCHES AWAY.
EMBROIDE THE EYEBROWS 3 ROWS
ABOVE THE EYES, USE THINNER THREAD.
EMBROIDE THE NOSE 1 ROW BELOW
THE EYES, BETWEEN 4 STITCHES.
23 (8sc, 1dec)6x (54)
24 (7sc, 1dec)6x (48)
25 (6sc, 1dec)6x (42)
26 (5sc, 1dec)6x (36)
27 (4sc, 1dec)6x (30)
28 (3sc, 1dec)6x (24)
29 (2sc, 1djm)6x (18)
30 (1sc, 1dec)6x (06)
31 (Dec)6x (06)
CLOSE WITH THE INVERTED MAGIC RING AND
FINISH THE THREAD.
HAIR
1 magic ring (06)
2 (inc)6x (12)
3 (1sc, 1inc)6x (18)
4 (2sc, 1inc)6x (24)
5 (3sc, 1inc)6x (30)
6 (4sc, 1inc) 6x (36)
7 (5sc, 1inc)6x (42)
8 (6sc, 1inc)6x (48)
9 (7sc, 1inc)6x (54)
10 to 12 sc, around (54) (3 row)
13 (8sc , 1inc)6x(60)
14 to 18 sc, around (60)
19 26sc, (Up 10ch: turn and
return with
9sc, fasten in the next stitch
with 1scx, and in the next stitch
another 1scx, continue this
sequence 4 more times ) plus
24bp.
LEAVE A LONG THREAD FOR
SEWING.
DINO CAP
1 anel mágico (06)
2 (aum)6x (12)
3 (1pb, 1aum)6x (18)
4 (2pb, 1aum)6x (24)
5 (3pb, 1aum)6x (30)
6 (4pb, 1aum) 6x (36)
7 (5pb, 1aum)6x (42)
8 (6pb, 1aum)6x (48)
9 (7pb, 1aum)6x (54)
10 (8pb, 1aum)6x (60)
11 a 15 pb, em volta (60) (5carr)
16 (9pb, 1 aum)6x (66)
17 a 18 pb, em volta (66) (2carr)
19 pb, em volta (em Flo) (66)
20 pb, em volta (66 )
ARREMATE O FIO.


MACACAO
1 Make 26ch: Fasten with 1sl st, forming a circle, continue
with sc in a spiral. We will have 25 double crochets considering
that we fasten the last one with 1 sl st.
2 to 8 sc, around (25) (7 row)
Do the same process on the second part of the jumpsuit but do not
fasten the thread, we will join the two parts. There must be
25 stitches on each part of the jumpsuit.
Make 3ch: Fasten with 1sc, make 24sc, 3sc in the chains, 25sc in the
other part, 3sc on the other side of the chains, 25sc. (56)
10 to 15 sc, around (56) (6 row)
16 (6 sc, 1 dec) 7x (49) 17
to 18 sc, around (49) (2 row)
19 (5 sc, 1 dec) 7x (42)
20 to 24 sc, around (42) (5 row)
FINISH THE THREAD.
jockstraps
1 Go up 30 ch: Skip 8 sc, turn and come back with
22 sc, fasten with 1 sl st, go up 30 ch: Skip 8 sc,
Turn and come back with 22 sc, fasten with 1 sbx.
FINISH THE THREAD.
HOT
1 anel mágico (06)
2 (2pb, 1aum)2x (08)
3 (3pb, 1aum)2x (10)
4 a 5 pb, em volta (10) (2carr)
6 (4pb, 1aum)2x (12)
7 (5pb, 1aum) 2x (14)
8 (6pb,1aum)2x (16)
9 (7pb, 1aum)2x (18)
10 (8pb, 1aum)2x (20)
11 a 12 pb, em volta (20) (2carr)
13 (9pb, 1aum)2x (22)
14 (10pb, 1aum)2x (24)
15 a 20 pb, em volta (24) (6carr)
21 (2pb, 1dim)6x (18)
22 pb, em volta (18)
23 (1pb, 1dim)6x (12)
24 a 25 pb, em volta (12) (2carr)
THORNS 3X
1 magic ring (06)
2 (1sc, 1inc)3x (09)
3 sc, around (09)
4 (2sc, 1inc)3x (12)
FOLD THE PIECE AND CLOSE WITH 5Sc
LEAVE A LONG THREAD FOR
SEWING
SAPATO 2X
1 magic ring (08)
2 (inc)8x (16)
3 (1sc, 1inc)8x (24)
4 (2sc, 1inc)8x (32)
5 sc, (in Blo) (32)
6 to 8 sc, in round (32) (3 row)
9 10sc, (1sc, 1dec)4x 10sc (28)
10 sc, around (28)
11 12sc, 1dec, 12sc (26)
12 sc, around (26)
FINISH THE YARN.
2X THORNS
1 magic ring (06)
2 (1sc, 1inc)3x (09)
3 sc, around (09)
FOLD THE PIECE AND CLOSE WITH 4Sc
LEAVE A LONG THREAD FOR
SEWING. FINISH

 1:sihirli halka içine 6X


 Legs
Legs Body
Body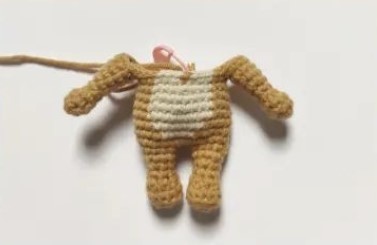 Head
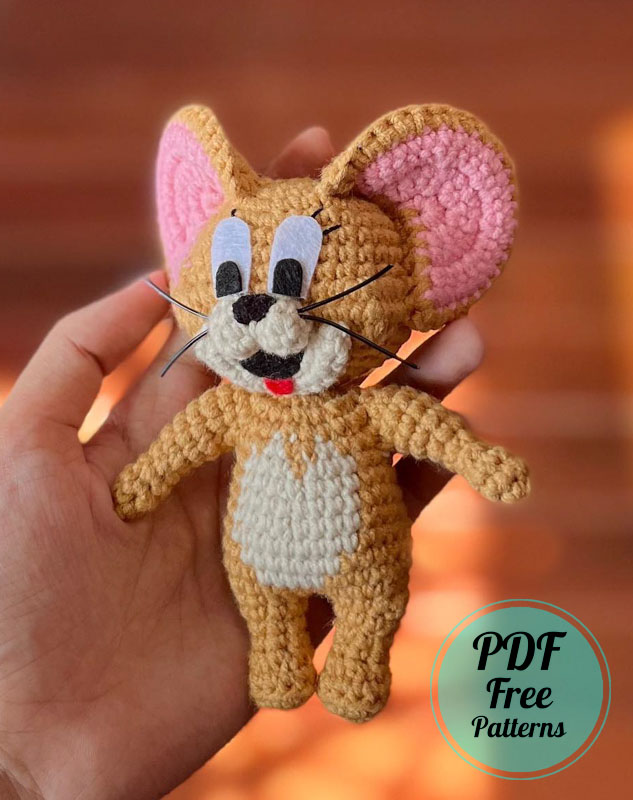
Head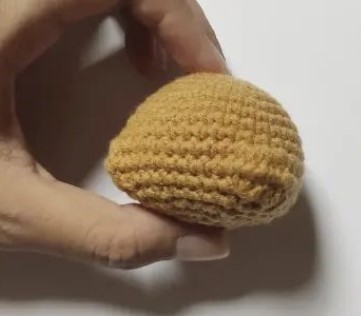 Ears (make two in brown and two in pink)
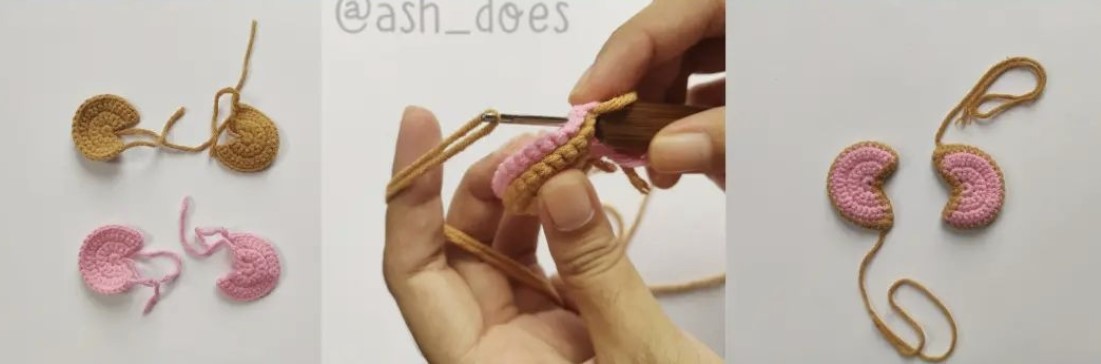 Snout
Snout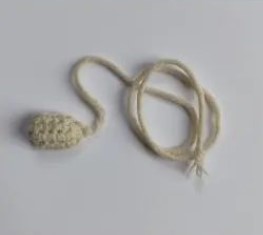 Mouth
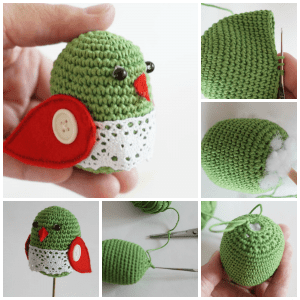
Mouth Jerry amigurumi mouse toy is ready.


 Hello amigurumi lovers and beautiful visitors, I wanted to share the free amigurumi patterns for you here. In my article I will share 1 pattern and how to make it for you. At the end of my article, I will share amigurumi patterns that can generate ideas for you.


 Ahora haremos las piernas, comenzando con ‘Pata 1’. Rellena las piernas a medida que avanzas. Tenga cuidado de no rellenar demasiado las piernas, ya que esto

 BOTAS – HACER 2


 Para ponerle las botas a su osito, gírelas sobre las piernas hasta que la pierna esté


 PARTE 2 – ARCO