
")

")

")


Knitted duck Lalafanfan from YarnArt Jean yarn

Knitted duck Lalafanfan from YarnArt Jean yarn

Crochet pattern for Lalafanfan duck
Materials:
- Hook No. 2
- Marker (I use a piece of yarn)
- Scissors
- Holofiber filler
- Tapestry needle
- Eyes diameter 6 mm, attached with glue
- Creative glue (for attaching eyes)
- Button for a hat
- YarnArt Jeans (55% cotton, 45% acrylic, 50 grams, 159 meters)
- Yarn color: 76 – body and cap, 67 – head and wings, 86 – ears and belly, 35 – beak
Abbreviations:
- KA – amigurumi ring
- VP – air loop
- sc – single crochet
- inc – increase (2 sc in one loop)
- dec – invisible decrease
- ss – connecting post
- ps – half single crochet
- psn – half double crochet
- dc – double crochet
- (…)x6 – repeat the contents of the brackets the number of times indicated after “x”
- (30) – the number inside the brackets means the total number of loops in the row
Cheeks (2 pcs)
Pink yarn. Spiral knitting
1st row: 6 sc in KA
2nd row: inc6, ss (12)
Cut the yarn, make an invisible connection.
Leave long ends at both cheeks for sewing.
Beak
Orange yarn.
1st row: in KA (sc, hdc, sc, hc) x2
Cut the yarn, leaving a long end.
Wings (2 pcs)
Yellow and blue yarn. Spiral knitting.
1st row: 6 sc in KA
2nd row: prx6 (12)
3rd row: (5 sc, inc)x2, change yarn on the last stitch (14)
If you are not knitting a suit, then you do not need to change the yarn
4, 5 row: 14 sc
6th row: 12 sc, dec (13)
7th row: 13 sc
Row 8: dec, 11 sc (12)
9 row: 10 sc, dec (11)
Row 10: dec, 9 sc (10)
11th row: 4 paired sbn
Legs 2 pcs
Blue yarn. Spiral knitting.
1st row: 5 sc in KA
2nd row: prx5 (10)
3rd row: (sc, inc)x5 (15)
4th row: behind the back walls of the loops 15 sc
5, 6 row: 15 sc
7th row: 7 sbn, inc, 7 sbn (16)
Row 8: 16 sc
Trim the yarn. Tie the other leg. Do not cut the yarn on the second leg.
Body
1st row: insert the hook into the loop of the 1st leg, sc into the loop after the last column of the 8th row of the 2nd leg, 7 sc, inc, 7 sc, sc into the loop in which the 1st sc was knitted, sc in the loop, in which the last sc of the 8th row of the 1st leg is knitted, 8 sc, inc, 7 sc (36)
2nd row: 17 sbn, inc, 18 sbn (37)
3rd row: inc, 8 sc, inc, 17 sc, inc, 9 sc (40)
4th row: 20 sbn, inc, 19 sbn (41)
5th row: inc, 40 sc (42)
6th row: 42 sc
7th row: 10 sbn, dec, 21 sbn, dec, 7 sbn (40)
8th row: 21 sbn, dec, 17 sbn (39)
9 row: 16 sbn, dec, 7 sbn, dec, 12 sbn (37)
Row 10: sc, dec, 34 sc (36)
11th row: 36 sc
Row 12: sc, dec, (4 sc, dec)x5, 3 sc (30)
Row 13: 30 sc
Row 14: (3 sc, dec)x6 (24)
15, 16 row: 24 sc
Trim the yarn.
Head
Yellow yarn. Spiral knitting.
1st row: 6 sc in KA
2nd row: prx6 (12)
3rd row: (sc, inc)x6 (18)
4th row: (inc, 2 sc)x6 (24)
5th row: (3 sc, inc)x6 (30)
6th row: 30 sc
7th row: sc, inc, (4 sc, inc)x5, 3 sc (36)
Row 8: 36 sc
Row 9: (5 sc, inc)x6 (42)
10th row: 42 sc
11th row: 2 sc, inc, (6 sc, inc)x5, 4 sc (48)
Row 12: 48 sc
13 row: 2 sbn, dec, (6 sbn, dec)x5, 4 sbn (42)
Row 14: 42 sc
Row 15: (5 sc, dec)x6 (36)
Row 16: 36 sc
17th row: sc, dec, (4 sc, dec)x5, 3 sc (30)
Row 18: (3 sc, dec)x6 (24)
Cut the yarn, leaving a long end.
Feathers on the head Pale yellow yarn. 1 feather: ss, ch 3, behind the outer loops of the chain from the 2nd loop from the hook 2 sc, cut the yarn, tie the 2nd feather next to it 2 feather: ch 2, into the 2nd loop from the hook sc
Tum
Pale yellow yarn. Spiral knitting.
1st row: ch 5, knit through the outer loops of the chain, into the 2nd loop from the hook inc, 2 sc, inc, 2 sc (8)
2nd row: (2 inc, 2 sc) x 2 (12)
3rd row: 4 inc, 2 sbn, 4 inc, sbn, ss (20)
Ears (4 pcs)
2 blue parts and 2 pale yellow ones.
1st row: 7 ch, behind the outer loops of the chain from the 2nd loop from the hook 2 sc, 3 hdc, 4 hdc in 1 loop, 3 hdc, 2 sc
Leave the blue pieces with long ends.
cap
Blue yarn. Spiral knitting.
1st row: 6 sc in KA
2nd row: prx6 (12)
3rd row: (sc, inc)x6 (18)
4th row: (inc, 2 sc)x6 (24)
5th row: (3 sc, inc)x6 (30)
6th row: sc, inc, (4 sc, inc)x5, 3 sc (36)
7th row: (5 sc, inc)x6 (42)
8th row: 2 sc, inc, (6 sc, inc)x5, 4 sc (48)
Row 9: (7 sc, inc)x6 (54)
10th row: 54 sc
11th row: (7 sc, dec)x6 (48)
12 row: 2 sbn, dec, (6 sbn, dec)x5, 4 sbn (42)
13th row: 27 sc, hdc, dc + picot, dc, hdc, 7 sc, hdc, dc + picot, dc, hdc, ss, cut the yarn, hide the end
Row 14: join the yarn ss in picot, which is closer to the marker, 30 sc, ss in picot
Row 15: ch 18, behind the outer loops of the chain from the 4th loop from the hook 15 sc
Cut the yarn and hide the end.
Assembly
1. The front side of the body is where the marker is. Sew the head to the body using a needle. Place the needle under the legs of the columns of the last rows on the body and head.
2. Sew the arms over the edge. When you sew on the handles, bring the end of the thread to the lower part of the legs and make a tightening so that the sole becomes flat. Stitch over the first row of the leg and pull the yarn taut. Secure the end.
3. Sew the beak in the center of the head between the 13th and 14th rows.
4. Glue the eyes between the 12th and 13th rows.
5. Sew on the cheeks. Make stitches above the legs of the posts.
6. Sew on the belly in the same way as the cheeks.
Duck Lalafanfan crochet video master class


Amigurumi Dog Snoopy Free Crochet Pattern

Amigurumi Dog Snoopy Free Crochet Pattern

Termonology
MR Magic Ring
Ch Chain
Sl st slip stitch
Sc single crochet
Hdc half double crochet
Dc double crochet
Tr (or trc) triple (or treble) crochet
Inc increase (Add one or more stitches.)
Dec decrease (Eliminate one or more stitches.)
Turn Turn your work so you can work back for the next row.
Join Join two stitches together; usually done by working a slip stitch in the top of the next stitch.
Rep repeat (Do it again.)
Pattern
Body
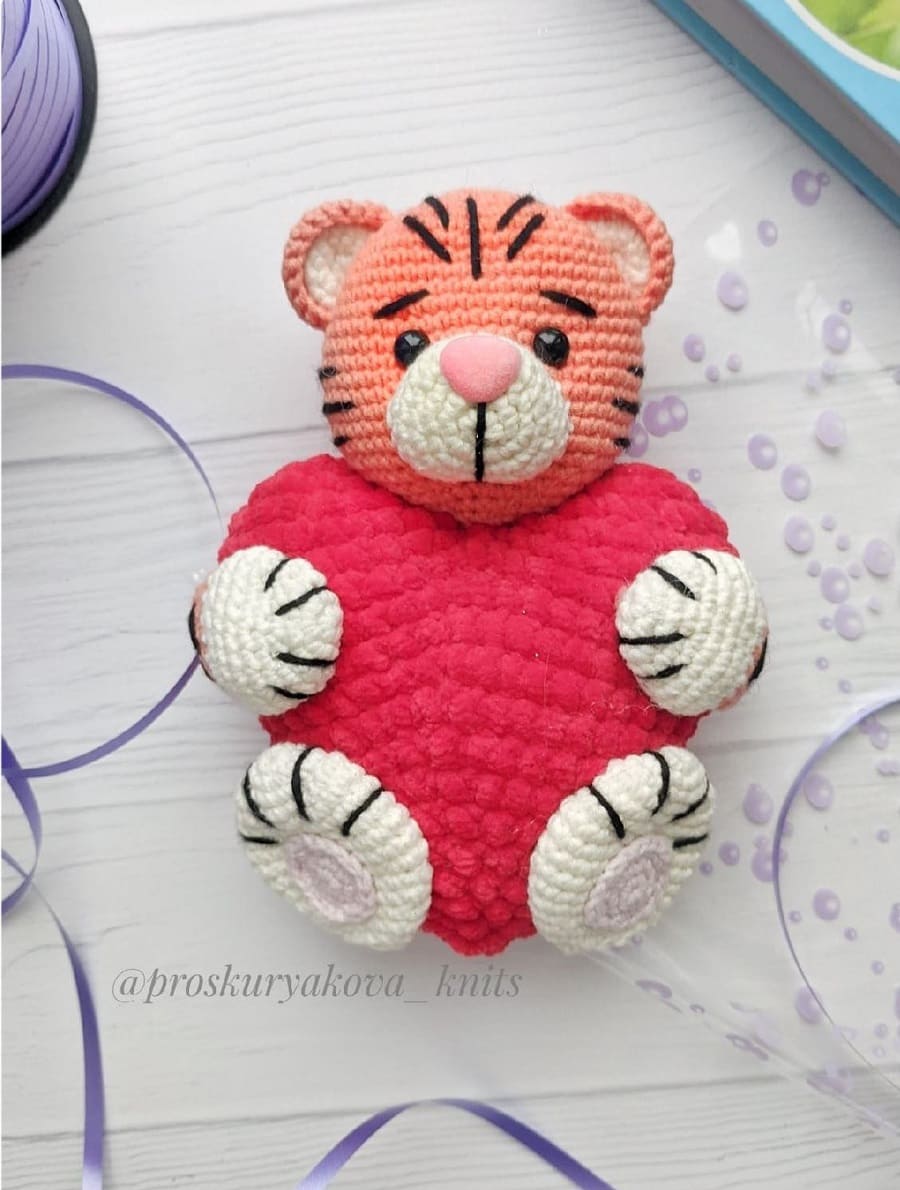
Amigurumi tiger with a heart

Materials:
- Himalaya Dolphin Baby yarn, color #80318 red (heart)
- YarnArt Jeans yarn, color # 23 (main color), white (muzzle and paws), black (for stripes)
- 2.0 mm and 3.5 mm for plush yarn
- 8 mm safety eyes
- 14 mm safety nose
- Tapestry needle
- Scissors
- Fiberfill
Abbreviations:
R = row
mc = magic circle
st = stitch
ch = chain
sc = single crochet
inc = 2 sc in the next stitch
dec = single crochet 2 stitches together
F.o. = fasten off
(12) = number of stitches you should have at the end of the round/row
( ) *6 = repeat whatever is between the brackets the number of times stated
Tiger
Legs (make 2)
With white yarn:
R 1: 6 sc in mc (6)
R 2: (inc)*6 (12)
R 3: (1 sc, inc)*6 (18)
R 4: (2 sc, inc)*6 (24)
R 5: 24 sc
R 6: (3 sc, inc) *6 (30)
R 7-10: 30 sc (4 rows)
R 11: (3 sc, dec) *6 (24)
R 12: 24 sc
R 13: (2 sc, dec) *6 (18)
R 14: 18 sc
R 15: (1 sc, dec) *6 (12)
R 16: (dec)*6 (6)
Stuff gently with fiberfill.
F.o.
Paw pads (make 2)
With pink yarn:
R 1: 6 sc in mc (6)
R 2: (inc)*6 (12)
R 3: (1 sc, inc)*6 (18)
F.o. and leave a long tail for sewing.
Sew paw pad on the leg.
Embroider paws with black yarn.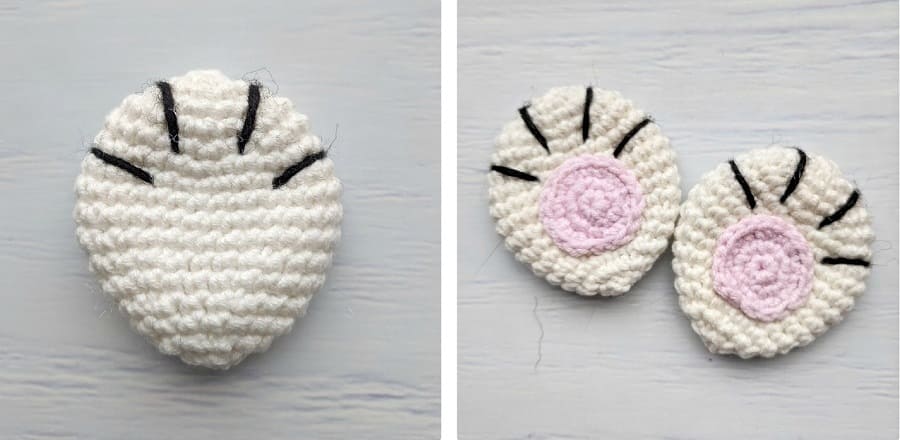
Arms (make 2)
With white yarn:
R 1: 6 sc in mc (6)
R 2: (inc)*6 (12)
R 3: (1 sc, inc)*6 (18)
R 4-5: 18 sc (2 rows)
R 6: (2 sc, inc) *6 (24)
R 7-8: 24 sc (2 rows)
R 9: (2 sc, dec) *6 (18)
Change to orange yarn:
R 10: (4 sc, dec) *3 (15)
R 11-15: 15 sc (5 rows)
Stuff only the bottom part of the arm.
Fold top of arm flat and sc through both sides across.
Embroider paws and stripes with black yarn.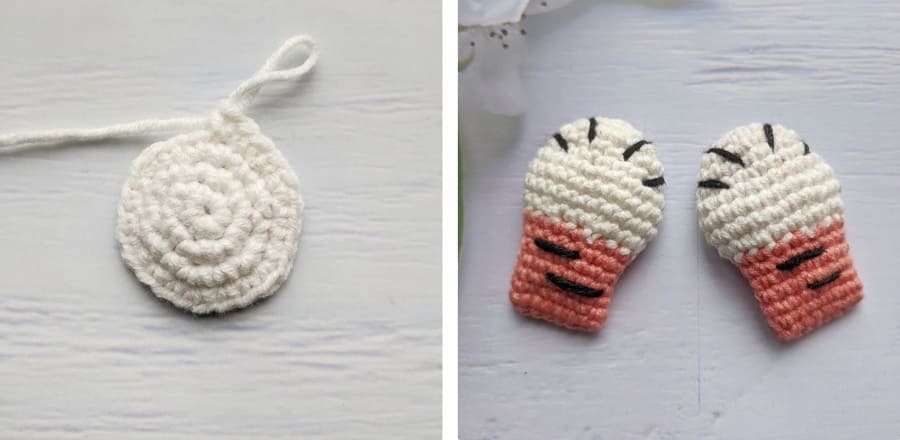
Muzzle
R 1: 6 sc in mc (6)
R 2: (inc)*6 (12)
R 3: (1 sc, inc)*6 (18)
R 4: (2 sc, inc)*6 (24)
R 5: 24 sc
F.o. and leave a long tail for sewing.
Insert safety nose in two rows below the center.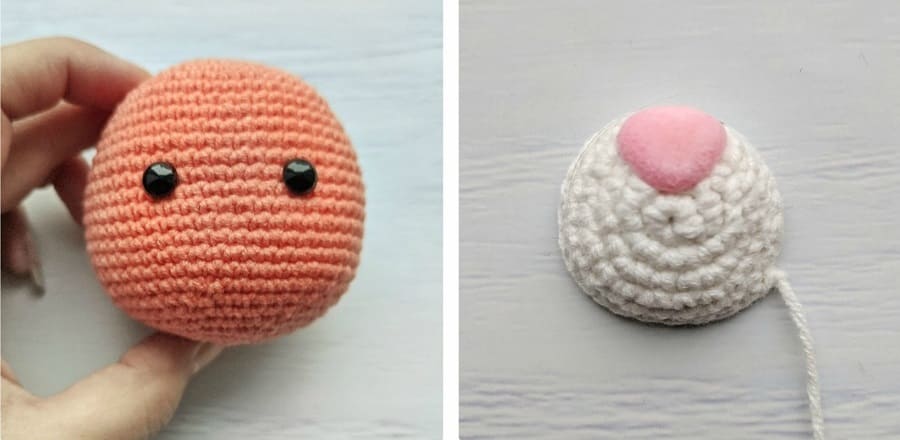 Head
Head
Stuff as you go.
R 1: 6 sc in mc (6)
R 2: (inc)*6 (12)
R 3: (1 sc, inc)*6 (18)
R 4: (2 sc, inc)*6 (24)
R 5: (3 sc, inc) *6 (30)
R 6: (4 sc, inc) *6 (36)
R 7: (5 sc, inc) *6 (42)
R 8: (6 sc, inc) *6 (48)
R 9-10: 48 sc (2 rows)
R 11: (7 sc, inc) *6 (54)
R 12-20: 54 sc (9 rows)
Insert safety eyes between R 14 and R 15 at the distance of 6 st from each other.
R 21: (7 sc, dec) *6 (48)
R 22: (6 sc, dec) *6 (42)
R 23: (5 sc, dec) *6 (36)
R 24: (4 sc, dec) *6 (30)
R 25: (3 sc, dec) *6 (24)
R 26: (2 sc, dec) *6 (18)
R 27: (1 sc, dec) *6 (12)
R 28: (dec) *6
F.o.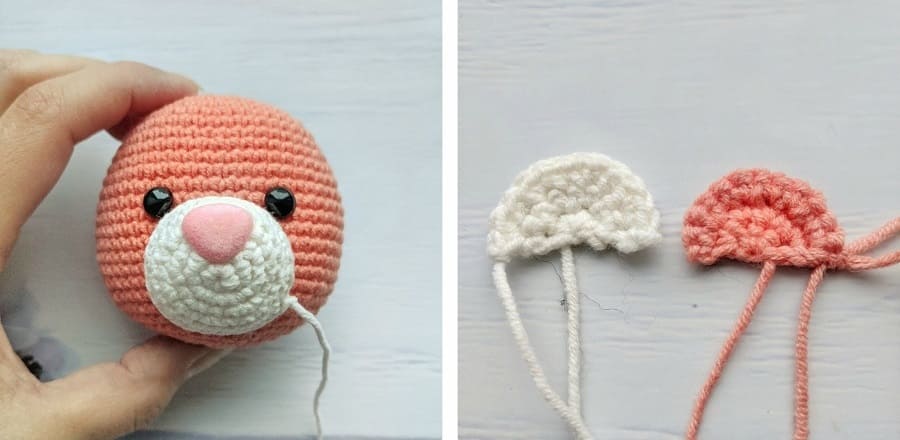
Ears (make 2)
Part 1
With white yarn in turning rows:
R 1: 4 sc in mc, 1 turning chain (4)
R 2: (inc) *4, 1 turning chain (8)
R 3: (1 sc, inc) *4 (12)
F.o.
Part 2
With orange yarn in turning rows:
R 1: 4 sc in mc, 1 turning chain (4)
R 2: (inc) *4, 1 turning chain (8)
R 3: (1 sc, onc) *4 (12)
Don’t cut the yarn!Fold together part #1 and part #2, turn with orange side to yourself.
R 4: 12 sc
Turn the work.
R 5: 12 sl st
F.o. and leave a long tail for sewing.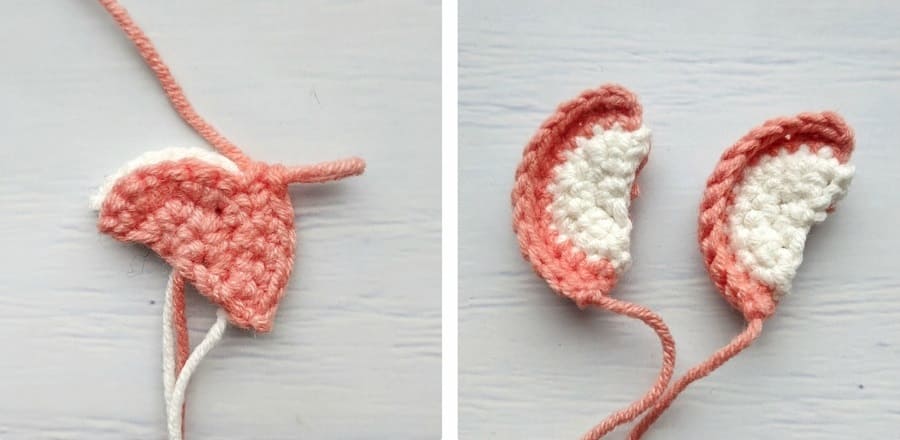
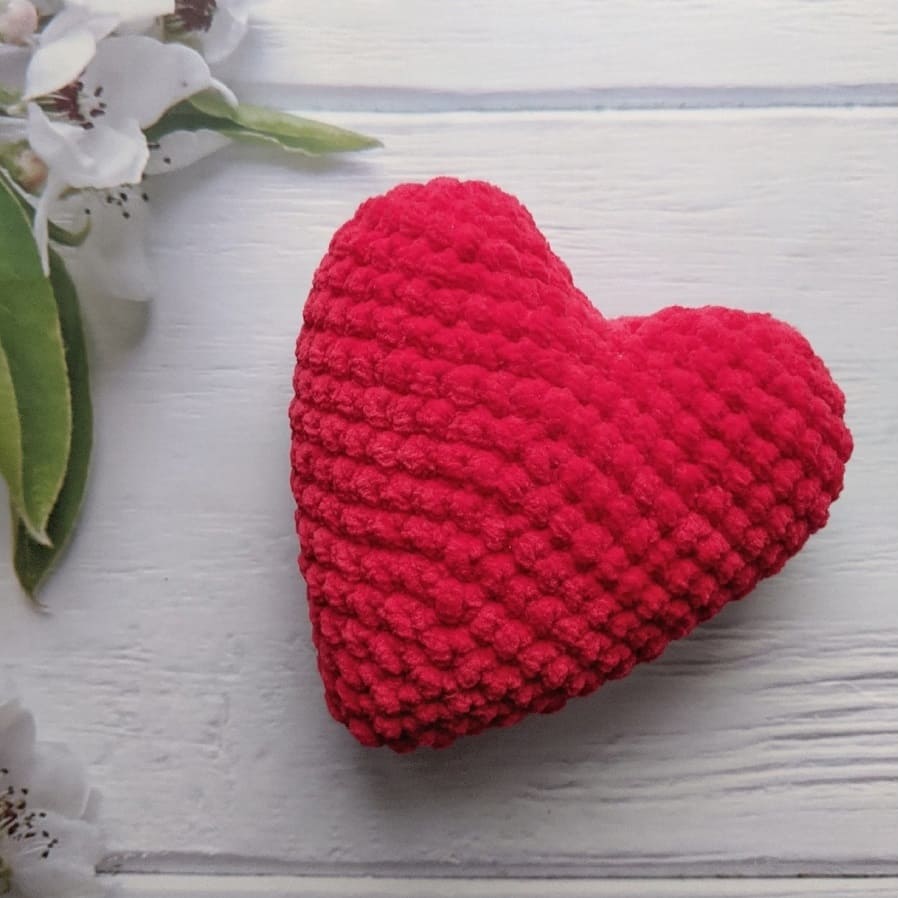
Heart
Stuff as you go.
Make 2 details:
R 1: 6 sc in mc (6)
R 2: (inc)*6 (12)
R 3: (1 sc, inc)*6 (18)
R 4: (2 sc, inc)*6 (24)
F.o
Don’t cut the yarn when you will finish the second detail.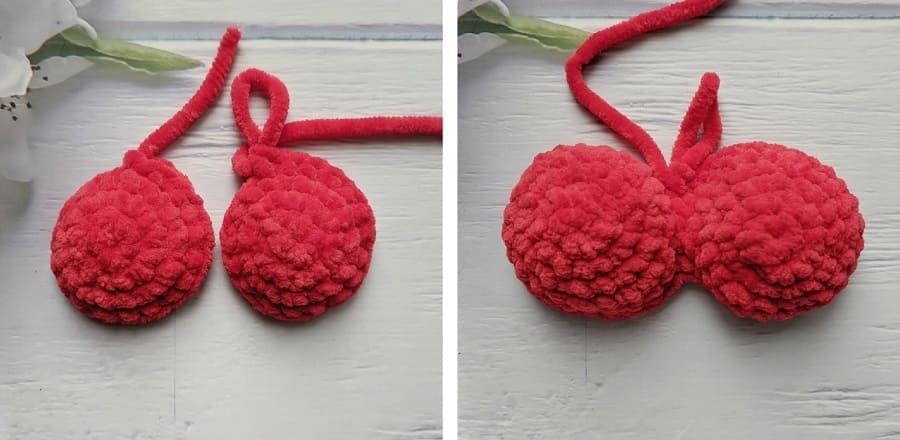 Join two details together:
R 5: 24 sc on the 1st detail, 24 sc on the 2nd detail (48)
R 6: 48 sc
R 7: 10 sc, dec, 22 sc, dec, 12 sc (46)
R 8: (21 sc, dec) *2 (44)
R 9: (9 sc, dec) *4 (40)
R 10: 8 sc, dec, 18 sc, dec, 10 sc, dec (38)
R 11: (17 sc, dec) *2 (36)
R 12: (7 sc, dec) *4 (32)
R 13: (6 sc, dec) *4 (28)
R 14: (5 sc, dec) *4 (24)
Stuff with fiberfill.
R 15: (4 sc, dec) *4 (20)
R 16: (3 sc, dec) *4 (16)
R 17: (2 sc, dec) *4 (12)
R 18: (1 sc, dec) *4 (8)
R 19: (dec) *4 (4)
F.o.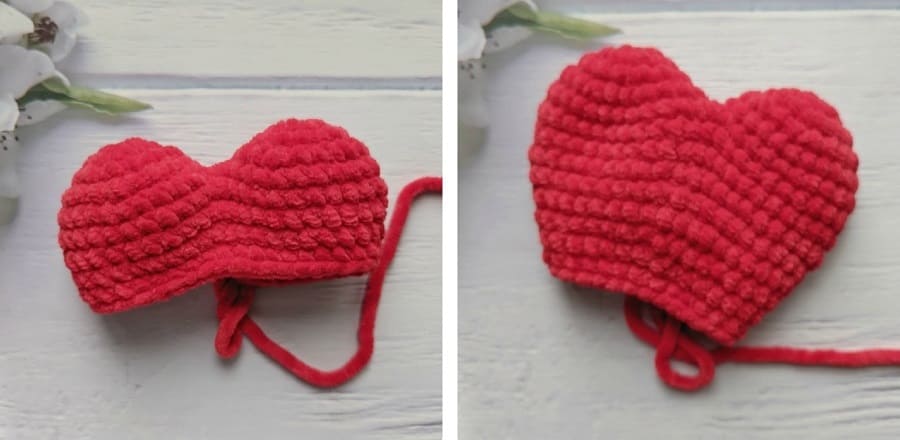
 Assembly
1. Sew muzzle under eyes between R 25 and R 16. Put some stuffing inside the muzzle before you finish.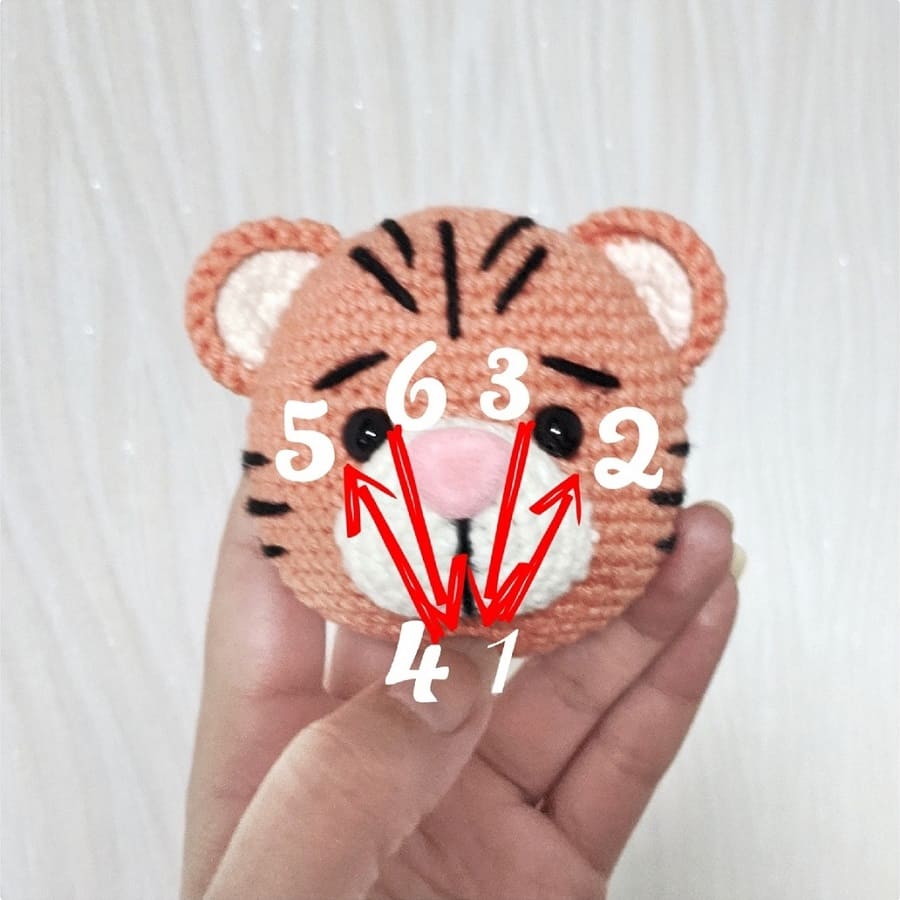
2. Take a long needle with thread, make a knot at the end of the thread.
Insert the needle from the point #1 and draw it out the point #2, than insert the needle in the point #3 and draw it out the point #1. Skip one stitch left and insert the needle in the point #4 and draw it out the point #5, than insert the needle in the point #6 and draw it out the point #4. Pull slightly.
Repeat one time more. F.o.
3. Sew ears on the head. Start on R 5-6 of the head.
4. Embroider stripes on the head, eyebrows and muzzle with black yarn.
5. Sew head, arms and legs to the heart.

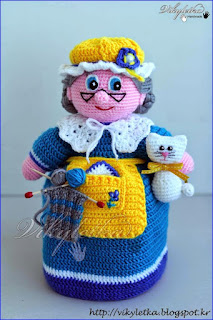
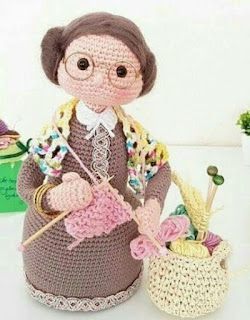
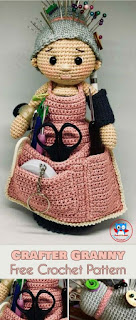
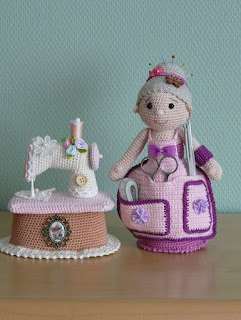
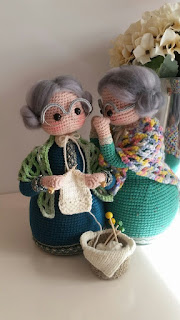
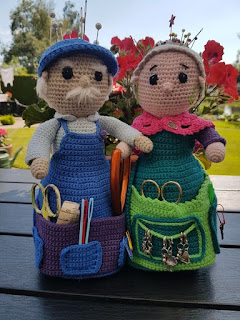

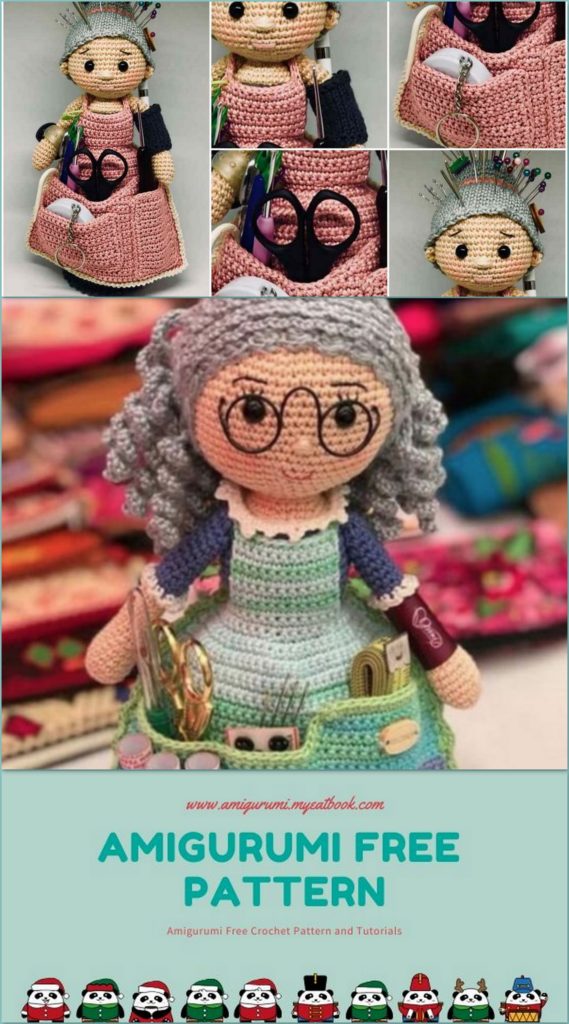
Amigurumi Crafter-Granny Free Pattern


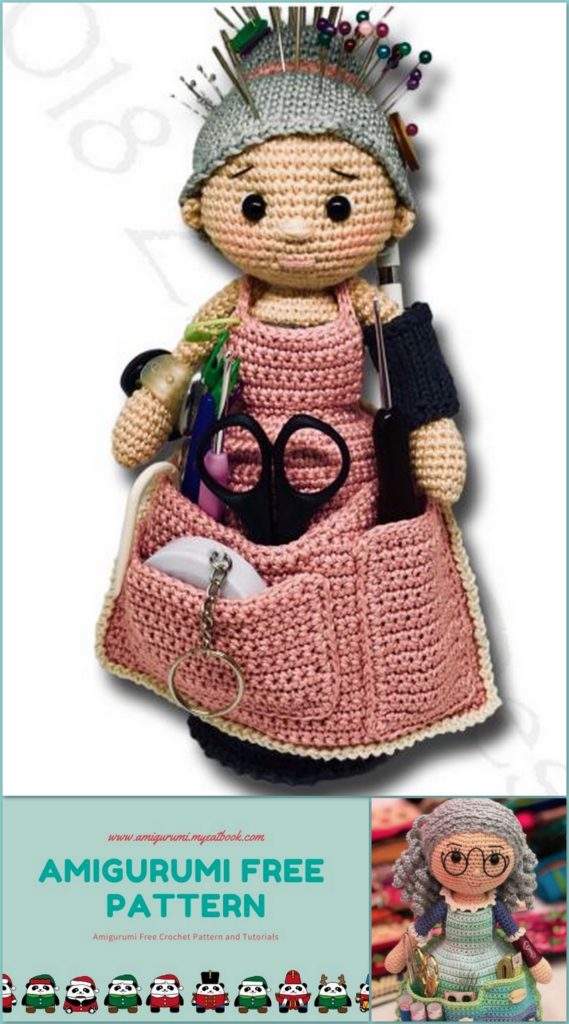
Materials:
With the specified wool, the figure is about 25 cm tall.
• Wool (Sport weight), for me: Schachenmayr Catania/
Scheepjes Catona (Fb. 242, 255, 408, 172, 130)
• Crochet hook in suitable size (for me: 2,0 mm and 2,5 mm)
• Stuffing
• some cardboard or plastic
• Stones, rice or suitable weighting materials
• Eyes of suitable size (in my case: 8 mm)
Abbreviations (US Terms):
MR = magic ring
sc = single crochet
ch = chain
st = stitch
slst = slip stitch
inc = increase
dec = decrease
BLO = back loop only
FLO = front loop only
The details of the wool and hook sizes I use are of course only examples. If you use wool other than indicated, the figure will be larger or smaller. Which wool is used, of course, is up to you. The needle size used must be adapted to the wool used and its own crochet. When crocheting Amigurumis you should use a much smaller hook size than indicated on the banderole or you would use for other crochet projects so that no holes are created during the stuffing. My stitching results with hook size 2 mm with six crocheted rounds a diameter of 4.5 cm.
It is – unless otherwise stated – crocheted in spiral circles.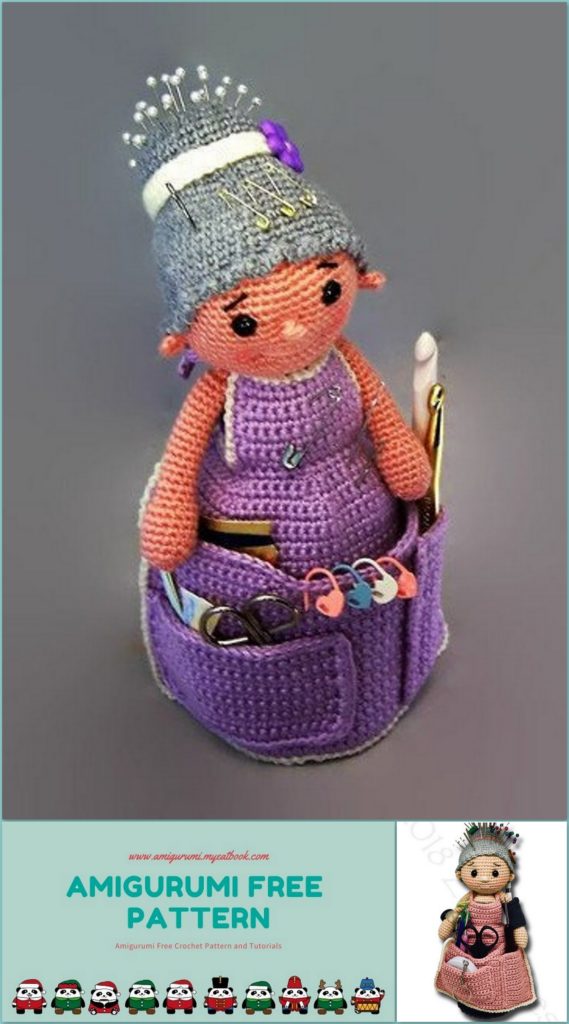

Head / Body:
skin color
Stuff the figure regularly during crocheting at a suitable place.
You can use e. g. a plastic bottle to fill the skirt. Fill the bottle with pebbles or
something like that for a better standing. Of course You have to adjust the skirt to
the size of the bottle.
1. sc 6 in MR (6)
2. inc x6 (12)
3. (sc 1, inc) x6 (18)
4. (sc 2, inc) x6 (24)
5. (sc 3, inc) x6 (30)
6. (sc 4, inc) x6 (36)
7. (sc 5, inc) x6 (42)
8. (sc 6, inc) x6 (48)
9. (sc 7, inc) x6 (54)
10.-19. (10 rounds) sc in each st (54)
When using safety eyes, attach them now between round 12 and 13 with about 8
stitches betweèn. Eyes for sewing can then be attached later at this point.
20. (sc 7, dec) x6 (48)
21. (sc 6, dec) x6 (42)
22. (sc 5, dec) x6 (36)
23. (sc 4, dec) x6 (30)
24. (sc 3, dec) x6 (24)
25. (sc 2, dec) x6 (18)
26. slst 1 in each st (18)
27. BLO: (sc 2, inc) x6 (24)
28. (sc 3, inc) x6 (30)
29. (sc 9, inc) x3 (33)
30. (sc 10, inc) x3 (36)
31. sc in each st (36)
Change color to clothing color (e. g. dark gray)
32.-37. (6 rounds) sc in each st (36)
38. (sc 10, dec) x3 (33)
39. sc in each st (33)
40. (sc 9, dec) x3 (30)
41. slst 1 in each st (30)
42. BLO: (4sc, inc) x6 (36)
43. (sc 5, inc) x6 (42)
44. (sc 6, inc) x6 (48)
45. (sc 7, inc) x6 (54)
46. (sc 8, inc) x6 (60)
47.-78. (32 rounds) sc in each st (60)
79. (sc 9, inc) x6 (66)
80. (sc 10, inc) x6 (72)
Fasten off, hide the yarn later in the body.
Bottom:
dark grey (clothing color)
1. sc 8 in MR (8)
2. inc x8 (16)
3. (sc 1, inc) x8 (24)
4. (sc 2, inc) x8 (32)
5. (sc 3, inc) x8 (40)
6. (sc 4, inc) x8 (48)
7. (sc 5, inc) x8 (56)
8. (sc 6, inc) x8 (64)
9. (sc 7, inc) x8 (72)
Do not fasten of, now connecting the bottom to the body.
First cut out of solid cardboard or flat plastic (of packaging, for example) a circle the size of the bottom plate. This gives a little more stability.
In the bottom of the dress near the bottom in addition to the filler put in some weighting material, either a larger (naturally cleaned) stone, or you could put it in a bag or sachet or rice etc. or wathever heavy weight materials You can use.
Now pick up the last stitch of the bottom plate, stitch through a loop of the bottom and through a loop of the dress and crochet together as follows:
1. ch 1, (sc 8, inc) x8 (always stitch through both pieces), finish round with a slst into the first sc (80)
2. (sc 1, ch 2, sc 1) in one stitch, skip 1 stitch – repeat until end of the round,
finish round with a slst into the first sc
Arm (2x):
skin color
Stuff Arm while crocheting.
1. sc 6 in MR (6)
2. inc x6 (12)
3. (sc 3, inc) x3 (15)
4.-8. (5 rounds) sc in each st (15)
9. (sc 1, dec) x5 (10)
10.-24. (15 rounds) sc in each st (10)
25. dec x5 (5)
Fasten off, leave a long tail for sewing.
Hairdo:
silver/light grey
1. sc 6 in MR (6)
2. inc x6 (12)
3. (sc 1, inc) x6 (18)
4. (sc 2, inc) x6 (24)
5. (sc 3, inc) x6 (30)
6. (sc 4, inc) x6 (36)
7.-11. (5 rounds) sc in each st (36)
12. (sc 4, dec) x6 (30)
13. slst 1 in each st (30)
14. FLO: (sc 4, inc) x6 (36)
15. (sc 5, inc) x6 (42)
16. (sc 6, inc) x6 (48)
17. (sc 7, inc) x6 (54)
18.-26. (9 roun
ds) sc in each st (54)
27. (sc 1, ch 1, sc 1) in one stitch, skip 1 st <— repeat until the end of the round.
Fasten off, leaving long tail for sewing.
Ribbon for the hair:
pink color
Here You have different options.
Maybe You will make a chain in a
corresponding length to reach around the bun,
crochet 1 or 2 rows sc, put it around the bun
and sew it together.
For such ribbons I mostly use cord from Planet
Big bag for the apron:
pink, NS 2,5 mm (just 1 or 2 sizes bigger than the other pieces before)
You are working in rows. Each row begins with a chain and You turn Your work at
the end of each row.
1. ch 41 sc 40, starts from second ch from hook (40)
2. -21. (20 rows) sc in each st (40)
22. sc 17 (leave the remaining stitches unworked), turn
23. ch 1, skip 1 st, sc 16, turn
24. ch 1, sc 15, turn
25. ch 1, skip 1 st, sc 14
Fasten off invisibly.
Join yarn at the other side (turn the piece once and crochet from the edge towards
the middle, again not over the whole width).
22. sc 15 (leave the remaining stitches unworked), turn
23. ch 1, sk 1st, sc 14, turn
24. sc 40 along the entire width
Fasten off invisibly.
Apron:
pink, NS 2,5 mm (just 1 or 2 sizes bigger than the other pieces before)
You are working in rows. Each row begins with a chain and You turn Your work at
the end of each row.
For the decreases You can also skip one stitch. This works very well for crocheting in
rows and it’s a bit more invisible than a normal decrease.
1. ch 41 sc 40, starts from second ch from hook (40)
2.-29. (28 rows) sc in each st (40)
30. (sc 8, dec) x4 (36)
31. (sc 7, dec) x4 (32)
32. (sc 6, dec) x4 (28)
33. (sc 5, dec) x4 (24)
Place the big bag exactly on the apron and mark the place where the bag ends. Now
You know later the place where You have to crochet the pieces together.
34. ch 30-40 (depending how long the ribbon should be for You), go back to the
apron while crocheting slip stitches, slip stitches along the upper side of the
apron in each stitch, again ch 30-40 for the other ribbon and go back with slip
stitches, now sc along the side (sc 1 per row), look for the marker and crochet
from this point the bag and apron together, than sc along the bottom through
both pieces, and again along the other side, crochet sc 1 per row, furthermore
crochet through both pieces, finish with a slip stitch into the first stitch.
Fasten off invisibly.
Join into the 7th stich for the upper part of the apron, make 1ch into the front loop
only. Crochet in rows.
1. FLO: sc 12
2.-8. (7 rows) sc in each st (12)
Fasten off invisibly.
Join at the right side of this newly made piece, make 1ch. Now along the side 1sc
per row. When You reached the top crochet agein 30-40 chains for the ribbon and go
back with slip stitches, make slip stitches along the top, aigain 30-40 chains for the
ribbon and go back with slip stitches, 1sc per row along the side.
Fasten off invisibly.
I have made two little bags in a corresponding size. Make a rectangle. I made one
with 20 stitches width and 12 rows up. The other bag 10 stitches width and 20
rows up. Crochet both around with sc, make 3sc into each edge for a nice finish.
I have divided the big bag into three parts, just sew with a few stitches at the top of
the bag.
Now sew the little bags to the big bag.
If You want, You can make a nice finish for the entire apron. Crochet e. g. with offwhite 1ch, 1slst <- repeat around.
Finishing:
Stuff the bun, put the hairdo to the head and pin it. Make with skin color sc 6 in a
magic ring for the ears, leave a tail for sewing. Make two. Pin the Ears to the head.
If You use Eyes
If the eyes are not yet attached, sew it to the head. Now check the alignment of the
ears and hair again and if everything is correct, sew it to the head. Embroider the
nose and mouth.
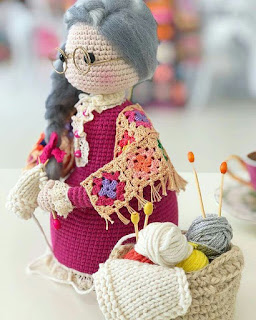
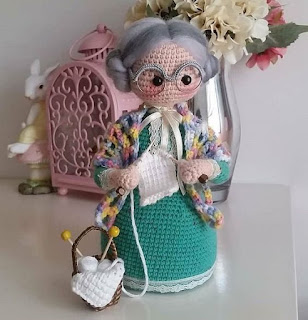
If you want your grandma to look a bit older, like in the
picture on the right, don’t embroider her mouth. Until
then everything is the same. Between the markers for
the mouth should be about 8 stitches, about 3 rounds
below the nose. Insert a skin or mouth colored thread
into a long enough needle. Insert the needle into the
back of the neck and come out at one of the two
marks, insert it into the second mark and go back to
the neck and come out exactly at the starting point.
Pull the thread tight until the toothless granny’s mouth
has formed and knot it well, then hide the threads
inside.
The mouth is now ready, but the face now looks a bit strange. This is due to the
position of the nose. Therefore use a skin-coloured thread and insert your needle in
the middle of the front side between head and body and come out on one side
directly above or just beside of the nose, insert again on the other side of the nose,
back down to the starting point. Pull the thread tight so that
the top of the nose is
pulled down a little and a sweet nose is formed (see pictures below), knot it well and
hide the threads.
Best of all, you can change it even after you’ve embroidered your mouth. Simply
remove it and then follow the steps described.
Sew the arms directly underneath the head left and right.
Finally, put on the apron and close the ribbons on the back to a bow.


